Happy Easter & DIY Easter bags

This year we actually get to stay home and partake in our Families Easter festivities! With Easter being during spring break we are typically driving to or from my happy place so we don’t get to enjoy it. Well this year we do and I’m so excited! I made these little bags for my niece and nephew. They were so easy too!

4-14 011

Below are the products I used4-14 013

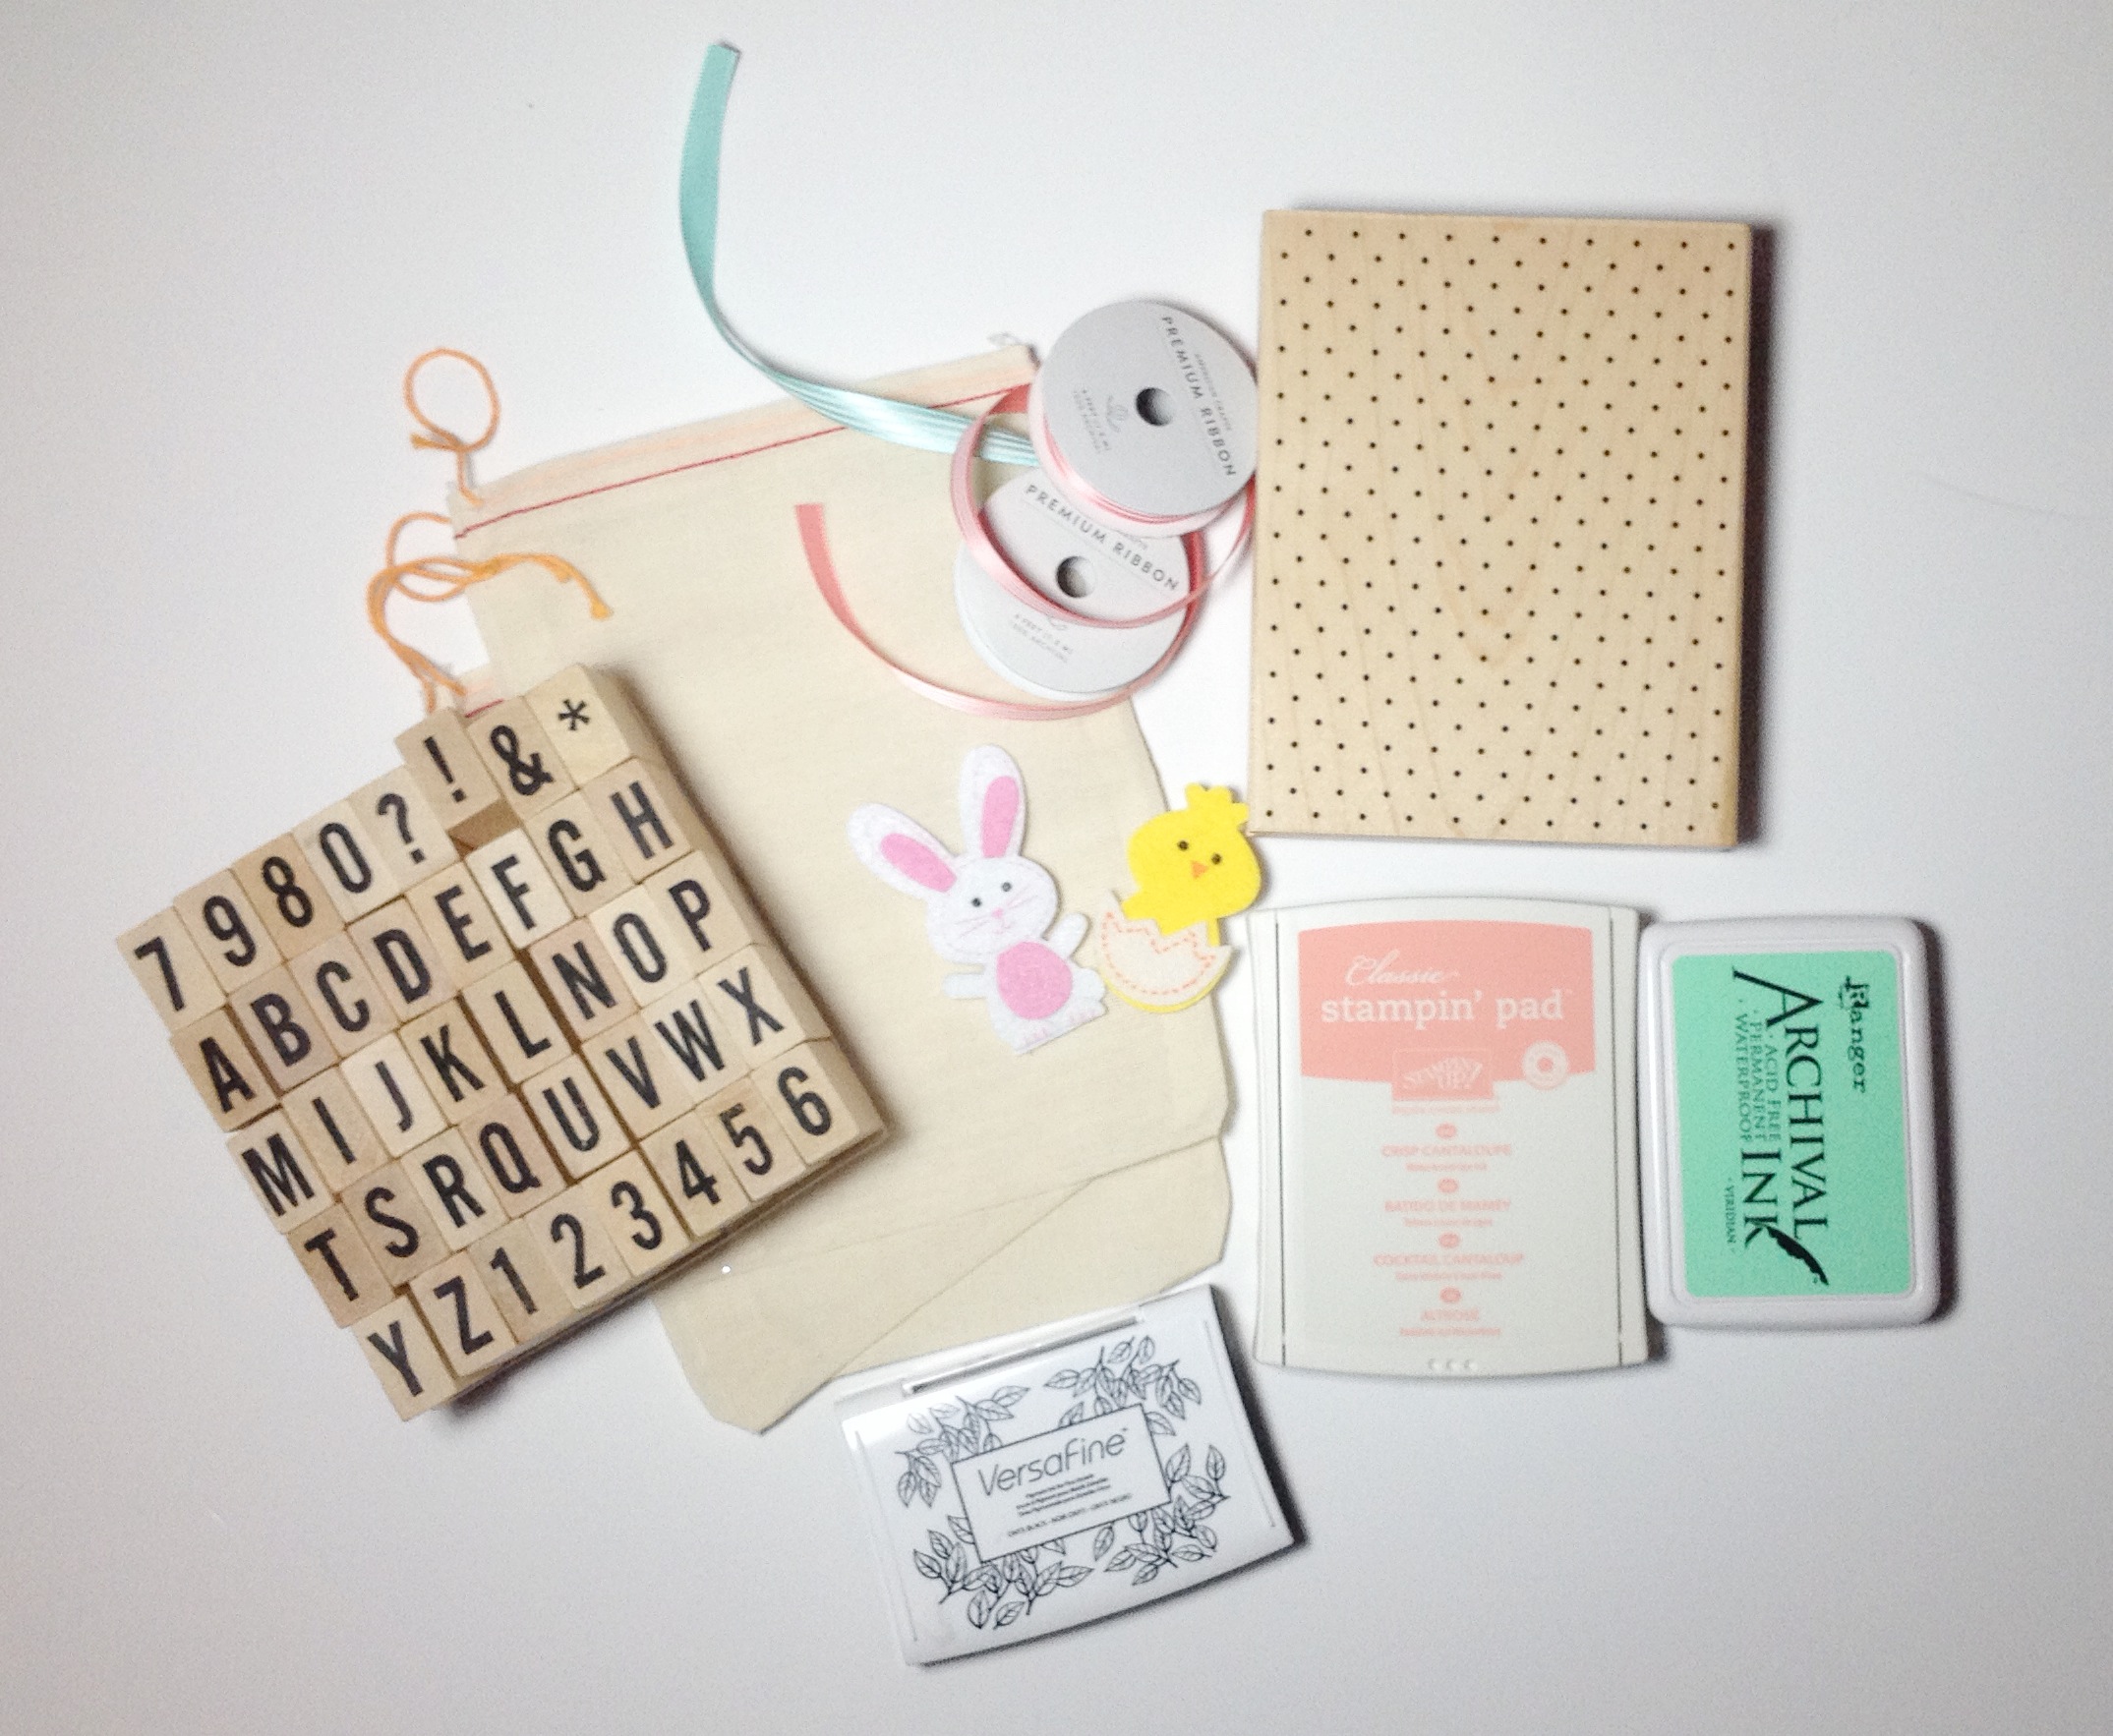
1) Simply stamp the bags with the large background stamp and stamp the words

2) Hand sew the ribbon on

3) Adhered the bunnies then secured them with one stitch (they are self adhesive)

4) Fill with your favorite goodies!

4-14 012


I hope you all have a wonderful Easter!!

♥Cherie

Happy 2014!

new years 006

Whohoo it’s a new year! I was ready. Not that last year was bad, it just wasn’t my favorite. So I’m ready for new, bigger and better things. Let’s do this 2014!

Here’s a quick tutorial on how I made the ‘2014’

Cut your numbers, star and starburts (I used my Silhouette Cameo for that)

new years 001

Grab a few strands of foil garland, hold it on the number and stick over it. do this until you’ve got a good amount on the number. Once you area happy with the amount you have trim the edges. Next sew on the stars and starburts.

new years 003

new years 002

After sewing all this fun stuff on the numbers punch hole in them and sting them. Ta-da easy peasy! It probably took me less than an hour to do all of them. and how fun would this be for a birthday? The possibilities are endless!

new years 004

New years eve eve!

It’s almost time! Just over 24 hours until the new year. Are you ready? Today I’m having mixed emotions about it, Ha! It always feels great to start fresh. Then again there were things I had hoped to get done this year that just didn’t seem to make it on my to-do list.  Anyhow New Years Eve will happen wither or not I’m ready for it so I decided to get a little festive. My Cameo has been getting a workout today helping me prepare party decor. Here’s a little sneaknew years decor 1 new years decor 2These fun little pouches are filled with small silver star confetti (use small confetti so it’s easy to vacuum).  I created the cards in my silhouette cameo program then printed them out. Easy peasy!

Have a happy safe New Years!

~Cherie

DIY iPhone case

Well I’ve been rediscovering my love for embossing these days! Especially with the fun colors and options out there now. I ordered this clear iPhone cover from Amazon. It was very cheap but shipping takes a while so factor that in when ordering.
My original plan was to add paper behind the cover (so it would show through) but that made it so the case wouldn’t stay on. So after felling like I had just wasted all this time carefully cutting my paper to fit I was a little annoyed. Then I saw my embossing powder sitting there and though well if I mess the case up it was only like a dollar so why not!
And it worked! I stamped the image with clear embossing ink then embossed it just like you would on paper  (or doilies!)
When you emboss it make sure the cover IS NOT on your phone! And remember it’s plastic so heat with care.
So far it’s holding up well!

Posted in DIY

7 year itch

On July 31st Jeff and I celebrated our 7 year wedding anniversary. In honor of that we had a 7 year itch party. Complete with back scratchers and all. It was such a fun night with our closest friends and family. I still can’t believe we have been married for 7 years. When I tell people that it just doesn’t seem possible. I still feel like I’m 18 straight out of high school. I wish life would just slow down a little. Ok back to the party 🙂

Here’s pictures of the details. Once I load and edit the rest I’ll share some more.
Have a great day!
Posted in DIY